Getting started with user sync using REST
Synchronizing users
To synchronize users from an external system, follow these steps:
- Register the external application and create the OAuth 2.0 keys in the Bizagi Work Portal of your environment.
- Get the token that permits invocation of SCIM services.
- Create the JSON structure needed with the information of the user to be synced.
- Invoke the service
The following procedure uses POSTMAN as the client. However you may use any other client using a different framework, as long as it is compatible with RESTful services using the OAuth 2.0 protocol.
Prerequisites
User synchronization using SCIM is only available for Bizagi projects using Automation Service (cloud) or Automation server (on-premises) using an SQL database.
Procedure
1. Register an OAuth application
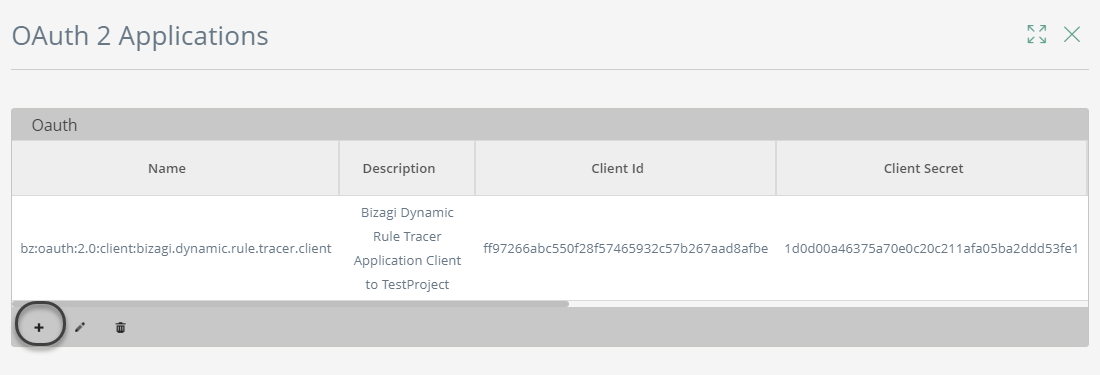
Go to the Work Portal. Under the security section of the Admin menu, select the OAuth2 Applications option to grant access to an external application.

This option lists services being accessed by Bizagi devices, and allows you to include additional applications that represent granted access to the services by providing the appropriate access keys.
Click the option to add a new record to this table:
The configuration must be like this:
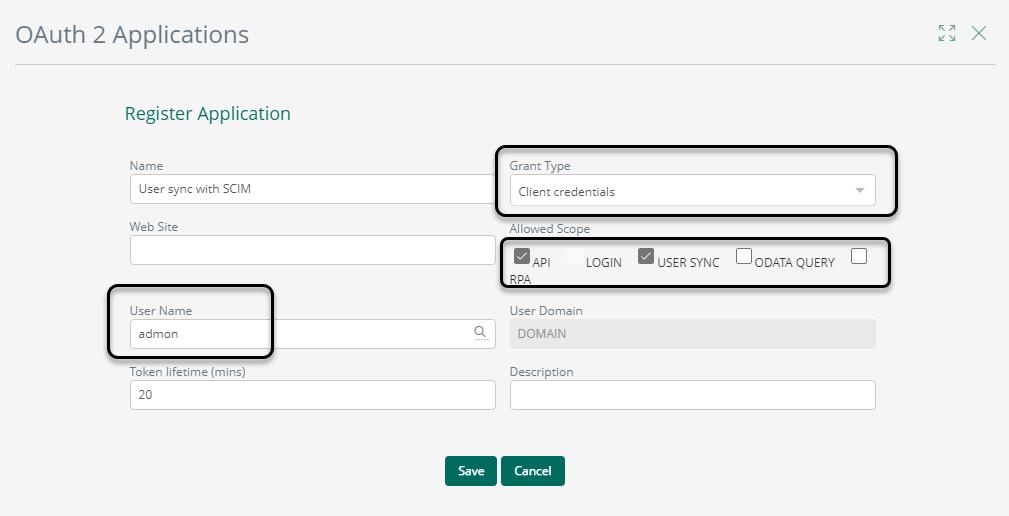
- Grant type: Client credentials
- Allowed Scope: API and USER SYNC
- User Name: admon
- Token lifetime: This duration depends on your organization's needs or policies.
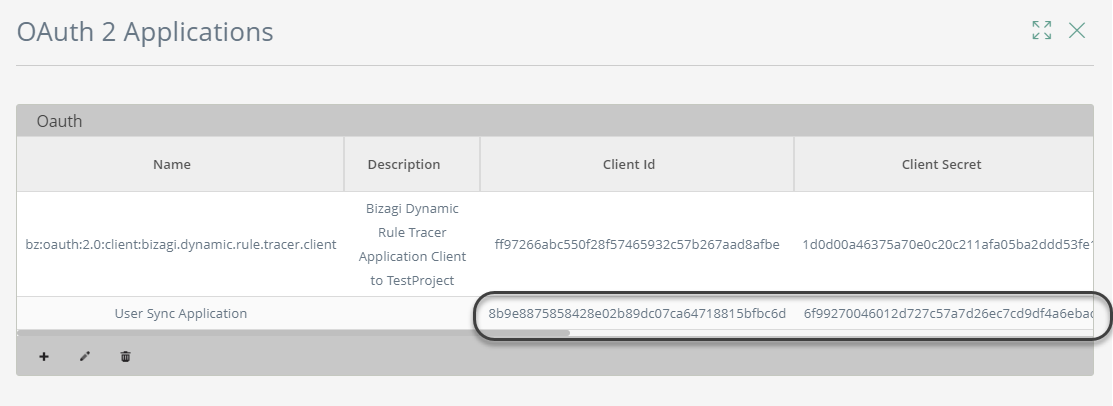
Save the keys in a secure place:
2. Authenticate with OAuth
Once you have copied the Client ID and Client Secret, you have to establish authenticated communication through your client.
Note that Bizagi expects the credentials as a single string encoded in base64.
2.1 To encode the credentials as a single string:
- Copy the Client ID, append a colon (:), then add the Client Secret.
Here is the format, disregarding the [ ] characters:
[Client Id]:[Client Secret] - Encode this string with base64. The result is a string containing the encoded credentials.
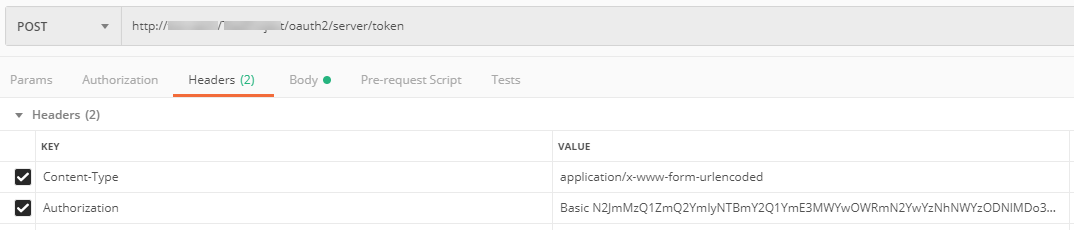
2.2 Configure a RESTful POST invocation in your client.
To do that, make sure that the client invoking the service has the following configuration:
-
URL:
[Project_URL]/oauth2/server/token -
HTTP Method: POST
-
Authorization: No Auth
-
Headers:
- Content-type: application/x-www-form-urlencoded
- Authorization: Provide the Basic keyword, add a blank space and then add the encoded credentials obtained in a previous step.
Use the following format, disregarding the [ ] characters:
Basic [encoded credentials]
-
Body: Send as raw data the following string:
grant_type=client_credentials&scope=api

The response to this invocation contains the access token:
{
  "access_token": "aebda3f1adcab6c90653bd1899613e880dc8002d",
  "token_type": "bearer",
  "expires_in": 1200,
  "scope": "api usersync openid",
  "http_status_code": 200
}
3. Create the JSON structure needed by SCIM
SCIM is a standard in which user information is defined by a schema. You need to recreate this structure in the message to be sent with the information of a user being synchronized. The structure depends on whether you are creating a new user, replacing a user, updating a parameter or deleting (deactivating in Bizagi) a user. See the supported operations in the next section.
4. Invoke the service
The next section shows examples of invocation of all possible operations.
-
Create: Service to create one user.
POST [Project_URL]/scim/v2/Users -
Read: Get information of a user.
GET [Project_URL]/scim/v2/Users/{userName} -
Update: Update the information of a user.
PATCH [Project_URL]/scim/v2/Users/{userName} -
Replace: These
PUT [Project_URL]/scim/v2/Users/{userName} -
Delete
DEL [Project_URL]/scim/v2/Users/{userName}